Buying a CNC Lathe: Key Features to Evaluate Before Purchase
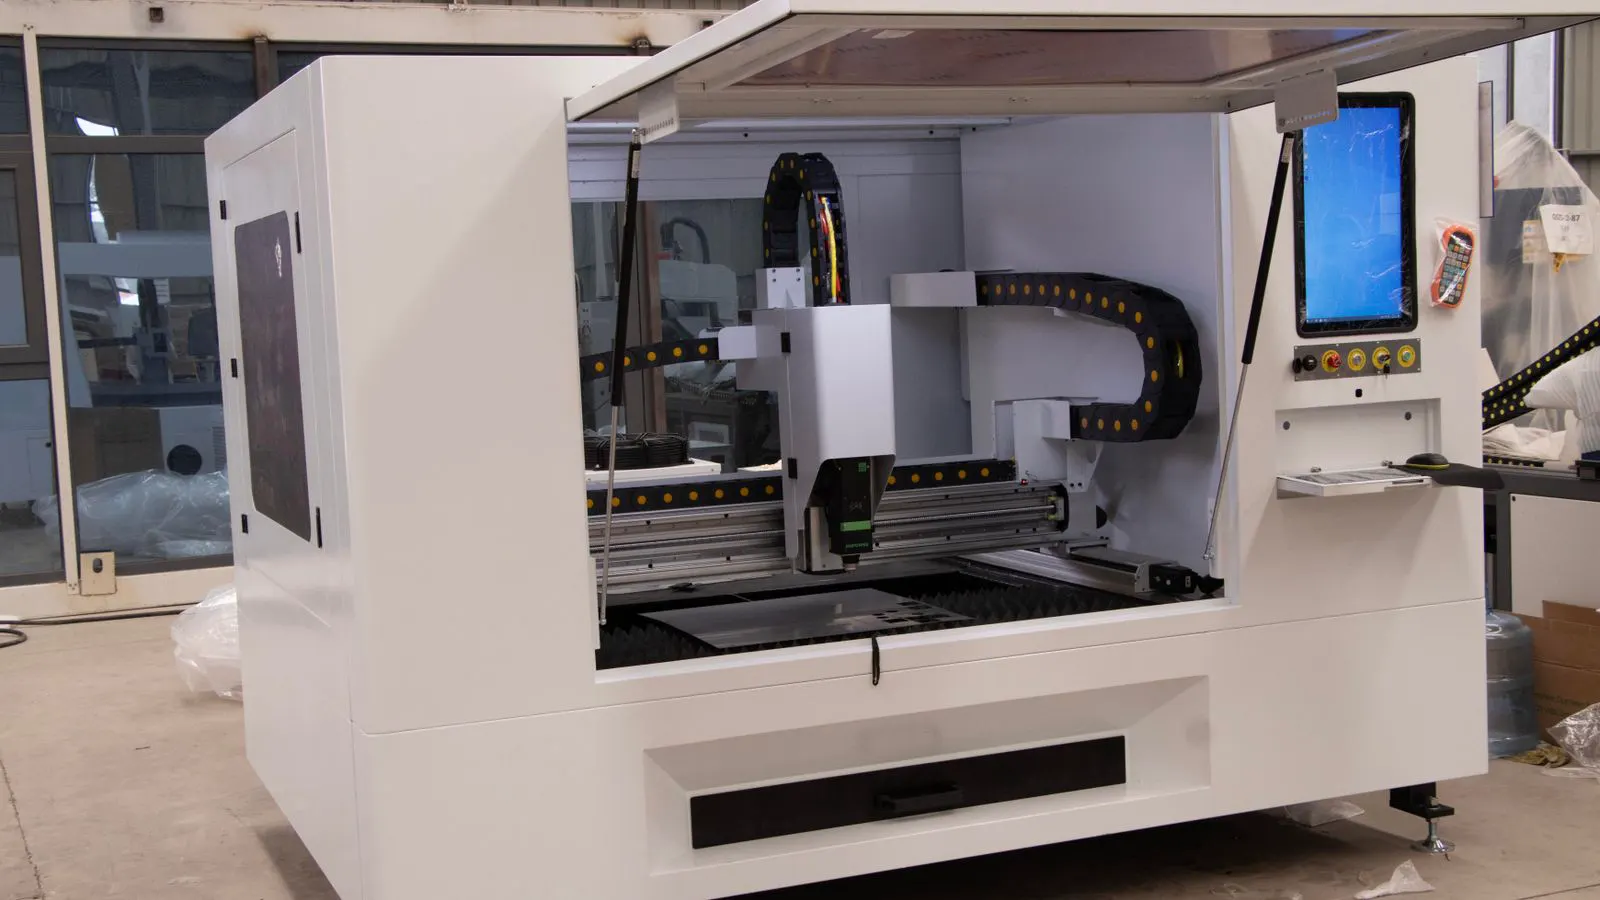
A CNC lathe buying guide helps buyers evaluate key features like spindle power, control systems, tooling, and vendor support. This framework covers lathe selection criteria and turning center features so you can match the machine to your production needs.
- Define your material, part geometry, and tolerance requirements before comparing machines.
- Evaluate spindle speed, power, and axis configuration against your actual production workload.
- Test the control interface and verify post processor compatibility with your CAD/CAM software.
- Confirm vendor support, spare parts availability, and installation timelines before signing.
- Request a trial cut or reference visit to validate real-world performance.
What Workload Requirements Should You Define First?
Before you compare machine specifications, you need a clear picture of what the CNC lathe must produce. List the primary materials, part families, and tolerance classes you will run. A machine built for high-speed aluminum turning will behave differently under a heavy steel forging workload. Identify your maximum part length, diameter, and weight. These numbers set the mechanical limits of the machine.
Start with the material science. Aluminum, stainless steel, carbon steel, and cast iron each demand different cutting forces and thermal management. Aluminum chips are long and stringy, requiring specific chip breakers. Cast iron produces short chips but generates significant heat. If you run both, your coolant system and tooling strategy must accommodate the extremes. Do not assume a machine rated for one material will perform well on another without modification.
Next, map your part families. Are you producing small, high-precision fittings, large structural components, or a mix? Small parts often require high spindle speeds and fine resolution. Large parts demand high torque and rigid beds. If your catalog shifts seasonally, note the swing in workload. A machine optimized for peak volume may waste money if the average run is low.
Define your tolerance classes. Is your target ±0.05 mm or ±0.005 mm? Tolerances dictate your need for thermal stability, backlash control, and probe capability. Tight tolerances often require a machine with a rigid structure and a control system that can compensate for thermal growth. If your parts go to the next stage of processing, such as heat treatment or assembly, note the critical dimensions.
Identify your maximum part length, diameter, and weight. These numbers set the mechanical limits of the machine. A 200 mm diameter part requires a larger headstock and a stronger bed than a 50 mm part. The weight of the part, especially if it is being turned while still in a rough state, affects the spindle load and the stability of the workpiece. If you are turning hollow parts, check the internal support capabilities. A machine that handles your largest part at 100% load may vibrate if that part is mounted off-center.
Determine your production volume. Running low volumes of custom parts favors a machine with flexible tooling and easy setup. High-volume production demands repeatability and minimal changeover time. Calculate your expected setup time. If you switch between ten different part families daily, you need a machine that allows for quick tool changes and program recall. If you run one part for a month, you can afford a setup that takes longer but offers higher precision.
If you are adding a second or third machine, verify that the new unit will match the capabilities of your existing equipment. Mismatched machines create bottlenecks and complicate maintenance. For example, if your first machine can only turn 120 mm parts and your new machine can handle 300 mm parts, the new machine may sit idle waiting for parts that the old machine could not process. Ensure that the tooling, control software, and operators are compatible across the fleet. Standardized tool holders and common control interfaces reduce training costs and simplify troubleshooting.
Finally, define your shop floor constraints. Measure the available floor space and check ceiling height. Verify that your electrical supply can support the machine. A standard three-phase supply is common, but some high-power units require upgraded service. Confirm your air supply for pneumatic tools and coolant capacity. These site-specific factors can limit the size of the machine you can install. Check the floor load capacity. A large lathe can weigh several tons. If the floor is not reinforced, you may need a steel deck or concrete pour. Also, consider the ventilation. High-speed turning generates fumes and heat. Ensure your shop has adequate exhaust and cooling to maintain a safe working environment.
How Do Spindle and Axis Specifications Affect Capability?
The spindle is the heart of the lathe. Evaluate spindle power and speed range against your materials. High-speed turning of non-ferrous metals benefits from a spindle that can reach higher RPMs. Heavy turning of cast iron or steel requires torque at lower speeds. Check the spindle bearing arrangement. Preloaded bearings offer better rigidity and a longer service life.
Look at the spindle speed range. A typical general-purpose lathe might run from 50 to 10,000 RPM. If you are cutting hardened steel, you may need low RPMs with high torque. If you are finishing aluminum, you may need high RPMs for a smooth surface. Check the acceleration curve. A machine that accelerates quickly to speed reduces cycle time. However, rapid acceleration can cause thermal shock to the bearings if done too frequently.
Consider the axis configuration. A basic lathe provides X and Z axes for standard turning. A turning center adds a second X axis for parting, threading, and multi-sided work. Some machines include a live tool head that adds a C-axis or additional X/Z axes. This allows drilling, milling, and chamfering in a single setup. If your parts require extensive milling or complex contours, a full turning center may be the right choice.
The second X axis is particularly useful for internal work. If you need to drill or mill a part that is already mounted in the chuck, a second X axis allows the tool to move across the part while the Z axis moves lengthwise. This is essential for creating internal pockets or complex profiles. Without a second X axis, you might need to remove the part, flip it, and re-clamp it, which introduces error and adds time.
Check the bed length and tooling capacity. A longer bed supports larger parts but increases the machine footprint. A higher number of tool stations reduces changeover time. Evaluate the tool changer type. Hydraulic carriages are robust and precise. Manual carriages are simpler and cheaper. The tooling system should accept the holders and inserts you already use. Compatibility with standard tooling saves money and training time.
If you choose a manual tool carriage, plan for operator involvement. Manual carriages require the operator to change tools and adjust offsets. This is a cost-saving measure but introduces human error. If you have a team of experienced machinists, a manual carriage may be sufficient. If you are running unattended shifts, an automatic tool changer is necessary. Check the number of tool stations. A 10-station turret is standard for many jobs. If you need more than 10 tools, look for a machine with a larger turret or a dual turret system.
What Control System and Software Features Matter?
The control system determines how easy the machine is to program and operate. Evaluate the display size, button layout, and menu navigation. A clean interface reduces operator errors and speeds up setup. Check the control’s communication capabilities. Ethernet and USB ports are standard. Look for support for remote monitoring and data logging.
The control interface is the bridge between the operator and the machine. A good interface displays real-time data, such as spindle speed, feed rate, and remaining cycle time. It should also allow the operator to override speeds and feeds safely. Check if the control supports macro programming. Macros allow you to repeat sequences of commands, which is useful for standard operations like chamfering or drilling. If your parts have repeating features, macros can significantly reduce program size and complexity.
Verify compatibility with your CAD/CAM software. Most CNC lathes use G-code, but post processor requirements vary. Ask the vendor for the post processor file for your specific CAD/CAM platform. Test a sample program before purchase. A machine that programs well on paper may struggle with your actual part files. Post processors translate your design into machine code. If the vendor does not provide a post processor for your software, you may need to hire a consultant to write one, which adds cost and risk.
Consider the control’s alarm and diagnostics features. A good control displays clear error codes and guides the operator to the fix. Look for built-in tool wear compensation and length offset management. These features improve part accuracy over long production runs. Evaluate the control’s ability to run multiple programs simultaneously or store large libraries of setups.
Tool wear compensation is critical for precision work. As an insert wears, the part dimensions change. Automatic tool wear compensation allows the control to adjust the tool offset based on the first few parts produced. This ensures that subsequent parts remain within tolerance. Length offset management is similar but applies to the Z axis. If you are turning a batch of parts, these features prevent the accumulation of error.
Check the control’s storage capacity. If you have hundreds of part programs, you need a control that can store them all. Some controls allow you to save programs to a USB drive or a network server. This is useful for backing up programs and for sharing them between machines. If you use a networked environment, ensure the control supports standard protocols like Ethernet/IP or Profinet for integration with your manufacturing execution system.
How Should You Evaluate Tooling and Auxiliary Systems?
Tooling is a major cost and a key factor in machine performance. Check the tool changer’s cycle time and reliability. A fast changer reduces downtime between operations. Evaluate the tool holders and inserts available. If the machine uses proprietary tooling, ask about availability and cost. Standard tooling is easier to source and maintain.
The tool changer cycle time is the time it takes to swap one tool for another. A fast changer might take 3 seconds, while a slower one might take 10 seconds. In high-volume production, every second counts. If you run a part with 20 different tools, a 3-second changer saves 100 seconds per part compared to a 10-second changer. Over thousands of parts, this adds up to significant production time.
Look at the coolant system. A high-pressure coolant system removes chips from tight spaces and cools the cutting zone. Check the coolant flow rate and pressure. Verify the tank size and filtration. A clean coolant extends tool life and improves part finish. Some machines offer through-spindle coolant for drilling and boring operations.
High-pressure coolant, often called through-the-tool coolant, is essential for drilling deep holes or boring large bores. It keeps the cutting zone cool and flushes out chips. Without it, chips can pack into the hole, causing the tool to break or the surface finish to degrade. Check the pressure rating of the coolant system. Higher pressure systems are more effective at cleaning but require higher-power pumps and more complex plumbing.
Evaluate the chip management system. A conveyor or chip basket keeps the machine area clean and safe. A good chip system reduces cleanup time and improves operator safety. Check the lubrication system for the spindle and ways. Regular lubrication prevents wear and extends machine life. Ask about the lubrication schedule and filter replacement intervals.
Chip management is not just a cleanliness issue. It is a safety and productivity issue. Chips can jam the tool changer, block the work area, and cause injury. A conveyor system automatically removes chips from the machine bed and deposits them into a container. This is ideal for unattended operation. A chip basket requires manual emptying, which can be a bottleneck during peak production. Check the chip conveyor’s width and speed. A wide, fast conveyor handles large volumes of chips more effectively than a narrow, slow one.
What Vendor Support and Service Factors Should You Verify?
A machine is only as good as the support behind it. Evaluate the vendor’s service network. How many technicians are available in your region? What is the typical response time for service calls? Ask about warranty terms and what is covered. A longer warranty period often indicates confidence in the machine’s reliability.
Vendor support is a major factor in total cost of ownership. A machine with excellent uptime but poor support can still cost you money if it breaks down and sits for weeks. Ask about the vendor’s service level agreement (SLA). Does the SLA guarantee a response time within 24 hours? Within 4 hours? If the machine is critical to your production schedule, a faster response time is worth the premium.
Check spare parts availability. Common wear parts like bearings, belts, and seals should be in stock or have a short lead time. Ask about parts ordering processes and typical delivery times. A vendor with a global parts network can reduce downtime if a rare component is needed.
Spare parts availability is particularly important for older machines. As a machine ages, parts may become obsolete. A vendor that maintains a stock of obsolete parts can extend the life of your equipment. Ask about the vendor’s policy on discontinued models. Do they still support parts for machines sold five years ago? If not, you may face high costs or long delays when repairs are needed.
Request references from other buyers. Ask about their experience with installation, training, and ongoing support. A vendor that provides thorough operator training and maintenance documentation saves time and prevents errors. Look for a vendor that offers preventive maintenance plans. Regular maintenance keeps the machine running at peak performance.
Training is a key component of support. A new machine requires trained operators to run it safely and efficiently. Ask if the vendor provides on-site training or if you need to send operators to a training facility. A good training program covers basic operation, troubleshooting, and maintenance. It also covers the control system and the specific tooling used. If the vendor does not provide training, budget for it separately.
How Do You Validate Performance Before Purchase?
A datasheet is not a guarantee. Request a trial cut or a production trial on your actual part. This test reveals the machine’s real capability under your conditions. Run the part for a defined period and measure dimensions. Check for dimensional drift, surface finish, and tool wear. Record any alarms or unusual noises.
A trial cut is the most effective way to validate a machine. Do not rely on the vendor’s sample parts. Use your own part files and materials. Run the part for a defined period, such as 50 parts, and measure the dimensions with a micrometer or a CMM. Check for dimensional drift. If the parts start within tolerance but drift out of tolerance after 50 units, the machine may have thermal issues or tool wear problems.
Check for surface finish. Use a surface roughness tester to measure the Ra value. Compare it to your requirements. A smooth surface finish reduces the need for secondary operations, such as polishing or grinding. Check for tool wear. If the insert wears out quickly, you may need to change the cutting parameters or use a different material grade.
Visit the vendor’s facility or a customer site. Seeing the machine in operation helps you understand its scale and capabilities. Talk to the operators and maintenance staff. Ask about common issues and how the vendor resolves them. A vendor that is transparent about limitations is more reliable than one that overpromises.
When you visit a customer site, ask to speak with the maintenance staff. They can tell you about common issues and how the vendor responds. Ask about the machine’s uptime. If the machine has been running for several years, ask about the number of breakdowns and the average repair time. This information is more valuable than a brochure.
Review the machine’s documentation. Read the operation manual and maintenance guide. Check the electrical schematics and hydraulic diagrams. Ensure you can access these documents electronically. A well-documented machine is easier to maintain and troubleshoot.
Documentation is critical for long-term maintenance. If you cannot find the manual for a specific component, you may need to call the vendor for help, which adds cost and delay. Ensure that the vendor provides digital copies of all documentation. This includes operation manuals, maintenance guides, electrical schematics, and hydraulic diagrams. If you plan to upgrade the machine in the future, having the documentation makes the upgrade process smoother.
What Is the Total Cost of Ownership?
The purchase price is only part of the cost. Evaluate the total cost of ownership. Include installation, training, tooling, and spare parts. Consider the energy consumption. A high-efficiency machine reduces operating costs over time. Check the machine’s uptime and availability. Downtime is expensive. A reliable machine with quick service response reduces lost production.
Total cost of ownership (TCO) includes all costs associated with the machine over its lifecycle. This includes the purchase price, installation, training, tooling, spare parts, maintenance, energy, and disposal. A cheaper machine may have higher TCO due to higher maintenance costs and lower uptime. Calculate the TCO for each machine you are considering. This will help you make a more informed decision.
Include installation costs. Installation may require floor preparation, electrical upgrades, and plumbing. These costs can vary widely depending on your shop’s current infrastructure. Ask the vendor for a quote that includes installation. Do not assume that the machine price includes installation.
Consider the energy consumption. A high-efficiency machine reduces operating costs over time. Check the machine’s power rating and estimate the energy cost based on your local electricity rates. A machine that uses 10 kW of power will cost more to run than a machine that uses 5 kW. Over five years, the difference can be significant.
Check the machine’s uptime and availability. Downtime is expensive. A reliable machine with quick service response reduces lost production. Ask the vendor about the machine’s mean time between failures (MTBF). A higher MTBF indicates a more reliable machine. Also ask about the mean time to repair (MTTR). A lower MTTR indicates a faster repair process.
Decision Checklist
- Define your material, part, and tolerance requirements.
- Verify spindle power, speed, and axis configuration.
- Test the control and software compatibility.
- Evaluate tooling and auxiliary systems.
- Confirm vendor support and service terms.
- Run a trial cut on your actual part.
- Review total cost of ownership.
Frequently asked questions
What is the minimum spindle power for a CNC lathe?
It depends on the material and part size. Light aluminum turning may work with lower power. Heavy steel or casting requires higher torque. Match the power to your specific workload.
How many axes do I need for my parts?
Check your part geometry. Standard turning needs X and Z. Parting or threading may need a second X axis. Complex contours may require a live tool head.
Can I use my existing CAD/CAM software?
Most CNC lathes use G-code. Verify the post processor for your specific software. Test a sample program before purchase to ensure compatibility.
How long does installation take?
Installation time varies by machine size and site readiness. A standard lathe may take a few days. A large turning center can take longer. Confirm the timeline with the vendor.
What warranty should I expect?
Warranties vary by vendor and machine type. Look for a clear warranty that covers major components. Ask what is excluded and how service claims are handled.